I was lucky enough to get early access to OpenAI’s GPT Builder, and I’ve got to say - it’s a game-changer. Gone are the days when building a custom chatbot required deep coding knowledge or complex integrations. With the GPT Builder, you can create your own unique GPT quickly, with just a few clicks.
I know there’s a lot out there about how to use GPT, but I wanted to make this guide to help you skip the guesswork and show you exactly how you can bring your idea to life. If you've been dreaming about a GPT that understands your specific needs or reflects your personality, you’re in the right place.
Let’s dive in and get you set up with your own custom GPT!
5 Easy Steps to Create Your Custom GPT
Creating a custom GPT using OpenAI's GPT Builder is fast and simple. You don’t need coding skills—just follow these straightforward steps to craft a GPT perfectly suited to your needs.
Step 1: Access the GPT Builder and Begin Customizing
- Go to the GPT Builder: Open ChatGPT, navigate to “My GPTs” in the settings, or go to chatgpt.com/gpts/editor.
- Click “Create a GPT”: This brings you into the customization interface, where you’ll personalize your GPT.
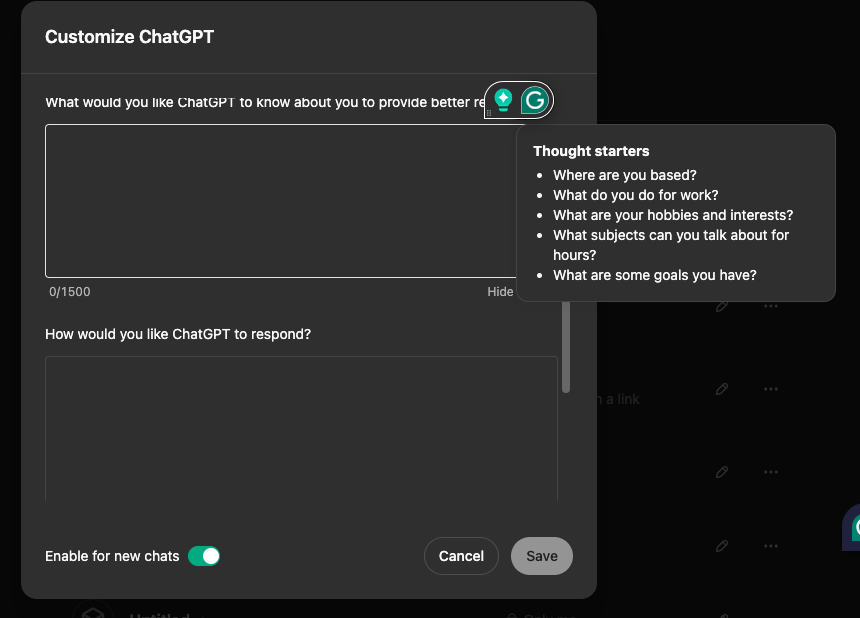
- Add Personalization Details:
- What ChatGPT Should Know About You: In the section labeled “What would you like ChatGPT to know about you to provide better responses?”, add details like your location, job role, interests, or hobbies. These thought starters help ChatGPT respond in a way that’s more relevant to you.
- Setting ChatGPT’s Tone and Style: Use the “How would you like ChatGPT to respond?” field to specify preferences for tone, style, or personality, so your GPT’s responses fit your communication style.
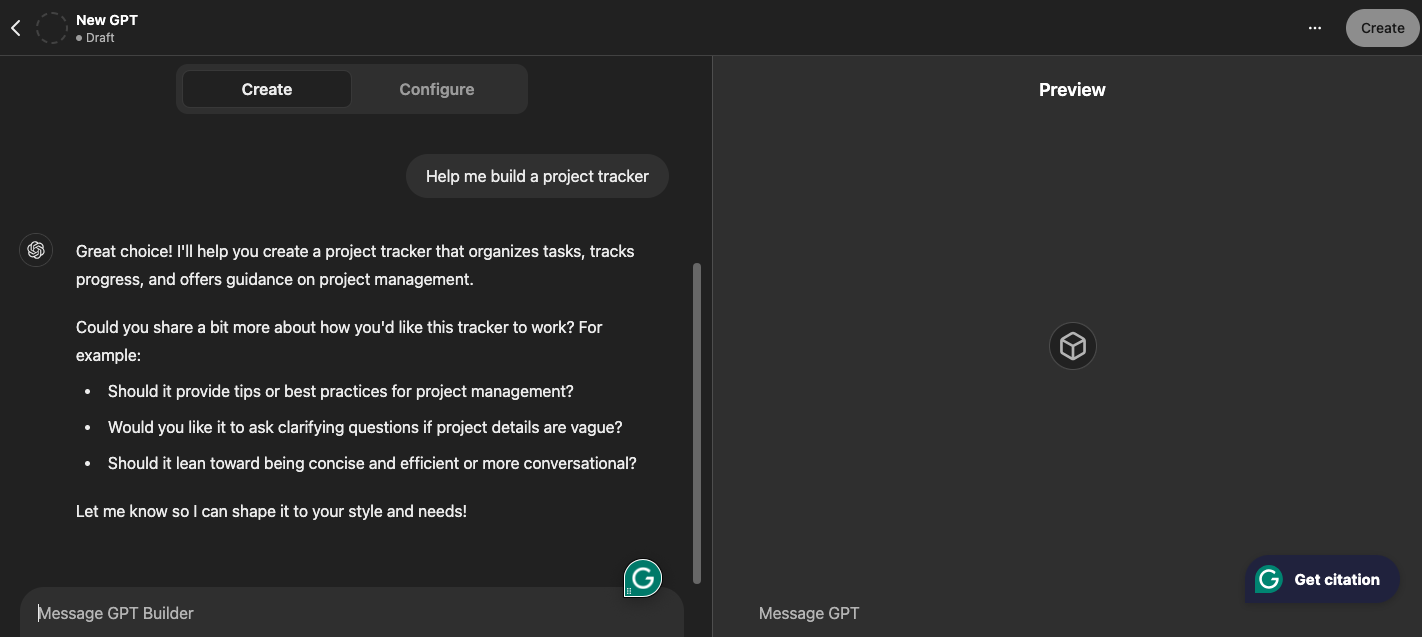
Step 2: Preview Your Custom GPT
- Preview Your GPT in Action: After entering your preferences, check the preview to see how your custom GPT will respond. This screen shows the name, purpose, and sample prompts that represent its interaction style.

- Make Adjustments if Needed: If the preview doesn’t quite match your vision, go back to adjust your settings until the GPT feels just right.
Step 3: Choose Sharing Options for Your GPT

- Decide Who Can Access Your GPT:
- Private: Keep it visible only to you.
- Shareable Link: Select “Anyone with the link” if you only want certain people to access your GPT.
- GPT Store: Publish it to the GPT Store if you’d like to make it available to a broader audience.
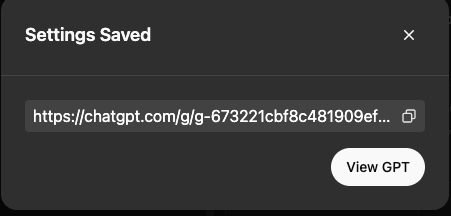
- Save and Copy the Link: Once you’ve set your sharing preferences, a link is generated. Copy this link if you plan to distribute it to others.
And that’s it! You’ve successfully created and customized your GPT with zero coding. Whether for personal use, project support, or sharing with others, OpenAI’s GPT Builder makes it easy to create a chatbot that’s perfectly tailored to your preferences. Enjoy interacting with your new custom GPT!
Real-Time Applications: Examples in Action
Incorporating real-time capabilities into your custom GPT unlocks powerful use cases that can boost engagement, enhance functionality, and offer a seamless interactive experience. Here are some professional-grade examples:
Customer Support Assistant
Create a GPT that instantly assists customers by answering frequently asked questions, guiding users through processes, and troubleshooting issues in real-time. With integrations that pull data from knowledge bases or CRM systems, your GPT can:
- Respond to inquiries with up-to-date information about product availability, shipping times, or policies.
- Guide customers through onboarding or troubleshooting steps dynamically, reducing wait times and creating a more responsive support experience.
- Hand off to human agents when necessary, while still providing immediate initial assistance.
This type of GPT is perfect for customer service, helping streamline the support process and enhancing the user experience.
Financial Market Tracker
For users who need instant access to financial data, a real-time market tracker can be invaluable. By connecting with APIs that provide live updates, your GPT can:
- Supply the latest stock prices, cryptocurrency rates, or economic indicators on demand.
- Offer summaries and trend analyses based on real-time data, helping users make informed decisions quickly.
- Set up alerts for specified price changes, so users are always in the loop on significant market movements.
This GPT is ideal for investors, financial analysts, or anyone who relies on timely market information.
Real-Time Language Translator and Cultural Guide
A GPT that provides real-time language translation and cultural context can be an excellent asset for people working or communicating across borders. By connecting to a translation API, your GPT can:
- Translate conversations in real-time, allowing users to communicate effectively regardless of language barriers.
- Offer cultural insights based on the context of the conversation, such as appropriate phrases, greetings, or etiquette.
- Support learning by explaining translation choices, helping users develop language skills on the go.
This GPT is perfect for global business professionals, educators, and language learners looking to communicate across languages smoothly.
Social Media Monitoring and Engagement Tool
A real-time social media GPT can help businesses and influencers stay on top of online trends, track brand mentions, and engage with their audience promptly. With social media integration, this GPT can:
- Track trending topics, brand mentions, or competitors’ activities on platforms like Twitter or Instagram.
- Suggest responses for engagement or crisis management, allowing users to respond to mentions or comments quickly.
- Provide analytics on engagement metrics to help users gauge their impact and refine their strategy.
This GPT is a valuable tool for marketing teams, PR specialists, and social media managers who need to stay connected with their audience.
IoT Device Monitoring Assistant
For users who rely on IoT devices, a GPT that monitors and interacts with IoT systems can make a real difference in efficiency and safety. By pulling real-time data from connected devices, you can:
- Display live data from devices such as smart home appliances, security systems, or industrial equipment.
- Alert users about potential issues, such as low battery, maintenance needs, or unusual performance metrics.
- Provide guidance on troubleshooting or maintenance steps, helping users address issues as soon as they arise.
This type of GPT benefits anyone managing IoT systems, from homeowners with smart devices to industrial technicians monitoring equipment.
Each of these examples shows how real-time functionality can transform a GPT from a static tool into a dynamic, responsive assistant that adapts to user needs instantly.
Monetization Strategies
Creating a custom GPT can unlock various monetization opportunities, allowing you to generate revenue while providing valuable services to your users. Here are some effective strategies to consider:
Subscription-Based Access
Offer basic features for free to attract users, and provide premium capabilities through a monthly or annual subscription. This model is ideal if your GPT includes advanced tools, specialized knowledge, or time-saving functionalities that enhance the user experience. For example:
- Basic Version: Offers core functionalities like answering common questions or providing general advice.
- Premium Version: Includes exclusive insights, advanced responses, or priority access for real-time support.
This approach appeals to a broad audience by offering something for everyone, with added value in the premium tier.
Freemium with In-App Purchases
In a freemium model, users access core functionalities at no cost and can purchase additional features or content upgrades as needed. This offers flexibility, letting users pay only for the features they find valuable. For example:
- Core Features: Answering basic questions or giving general recommendations.
- In-App Purchases: Options to unlock specific tools, resources, or deep-dive analyses on-demand.
This model works well for GPTs that offer niche expertise or insights that users may want to access on an as-needed basis.
Enterprise Licensing for Business Users
For companies or teams, consider an enterprise licensing model with tailored configurations, integration options, and dedicated support. This approach is ideal for GPTs that serve specialized business needs or can be customized for specific industries. Examples include:
- Custom GPTs for Different Departments: Such as customer support, HR, or project management tools.
- API Integrations and Onboarding Support: Offering businesses dedicated help for setup and training, which is valuable for larger teams.
This model allows you to offer additional value through customization, making it easier for organizations to adopt your GPT as part of their workflow.
Sponsored Content and Non-Intrusive Ads
Incorporate sponsored content or ads within your GPT’s responses to generate revenue without disrupting the user experience. To maintain relevance, consider partnering with brands that align with your GPT’s purpose and audience. For example:
- Sponsored Recommendations: Offer product or service suggestions that match user queries (e.g., suggesting productivity apps or resources relevant to the user’s interests).
- In-Chat Banners: Discreet ad placements or brand mentions that add value without overwhelming the user.
This approach works well for GPTs focused on areas like e-commerce, lifestyle, or travel, where sponsored content can feel natural and helpful.
Pay-Per-Use or Session-Based Charges
Charge users based on the number of interactions, usage time, or specific high-demand functions, making it cost-effective for those who only need occasional access. This model suits GPTs that offer data-driven insights, on-demand analytics, or other resource-intensive features. For example:
- Limited Free Sessions: Allowing users to try the GPT with a set number of free interactions before introducing a pay-per-session model.
- Analytics and Data Processing: Charging per report, summary, or analysis provided by the GPT, especially if it pulls in real-time data.
This pay-as-you-go model appeals to users who need intermittent but high-value interactions, making it ideal for specialized, resource-heavy applications.
Security Best Practices
Protecting user data and ensuring secure interactions with your custom GPT is essential for maintaining trust and reliability. Here are best practices to help you enhance security and minimize risks.
1. Implement Strong Authentication
For GPTs that access sensitive data or personal information, use OAuth2 or API key-based authentication. This ensures that only authorized users can interact with the GPT, adding an essential layer of protection.
- OAuth2: Ideal for scenarios where user data is stored, providing secure authorization.
- API Key: Useful for custom GPTs with integrations, allowing secure communication between your GPT and connected services.
2. Validate and Sanitize Inputs
Prevent unauthorized access and potential injection attacks by validating and sanitizing all incoming data. This involves:
- Input Filtering: Rejecting unexpected characters or formats before processing data.
- Data Formatting: Ensuring that inputs adhere to expected types, such as strings, dates, or numbers, to minimize security vulnerabilities.
By filtering out risky inputs, you reduce the likelihood of malicious data affecting your GPT’s performance or user experience.
3. Encrypt Data in Transit and at Rest
Encryption is crucial for protecting sensitive information exchanged with your GPT:
- HTTPS for Data in Transit: Use HTTPS to encrypt data during transmission, preventing interception by unauthorized parties.
- Encrypt Sensitive Data at Rest: If storing user information, consider encryption protocols that protect data even in the event of a breach.
This approach keeps user information secure and demonstrates your commitment to privacy.
4. Set Up Error Handling and Secure Logging
Effective error handling and logging not only improve your GPT’s reliability but also help detect suspicious activity:
- User-Friendly Error Messages: Avoid revealing technical details in error messages. Instead, provide clear, informative messages that guide users without exposing sensitive information.
- Secure Logging: Log interactions and incidents to a secure location, which aids in troubleshooting and monitoring activity. Only log necessary information and restrict access to authorized personnel.
These practices help safeguard both your GPT’s functionality and user data.
5. Conduct Regular Security Audits and Apply Timely Updates
Security needs to evolve, so performing routine audits and updates is essential:
- Regular Security Audits: Check for vulnerabilities and weaknesses in your GPT’s configuration, data handling, and integration points.
- Update Dependencies Promptly: Ensure any connected APIs, libraries, or tools are up-to-date, fixing potential security flaws as soon as updates are available.
Gathering feedback and staying proactive with security checks helps ensure your GPT remains a trusted, secure tool for users.
Start Creating Your Personalized GPT in Minutes
Creating a custom GPT is now easier than ever, allowing you to design a chatbot that’s uniquely suited to your needs. By following these steps, you can bring your ideas to life with a GPT that reflects your style, supports your projects, or engages your audience.
At Dart, we have been building a task and project management tool that utilizes AI for a while. Integrating with ChatGPT was an exciting next step in this process. It’s a natural fit because ChatGPT is the future of AI-based chat, and Dart is the future of AI-based project management.
To see how Dart leverages AI to streamline project management, explore our platform and discover how these advancements can transform your workflow.
Frequently Asked Questions
Still not sure? Let us explain a couple of things.
Can a custom GPT handle real-time applications?
Yes, custom GPTs can support real-time applications if integrated with external APIs that provide live data. This way, it can deliver immediate, relevant responses for applications like financial tracking, customer support, or IoT monitoring.
Can I monetize my custom GPT?
Yes, it can be monetized through subscriptions, premium features, or access tiers. By offering added value, you can create a revenue stream that aligns with the needs and interests of your audience.
How can I ensure strong security?
For a secure experience, implement strong authentication, validate inputs, and use encryption protocols. Regular updates and gathering user feedback help to identify and resolve potential security issues over time.
What advanced features can I add?
Enhance your tool with features like real-time data, multilingual support, or integrations with other services. These additions can make your tool more versatile and valuable to users.
What’s the best way to handle errors or failed responses?
Design clear error messages and fallback responses to assist users if issues arise. For robust applications, consider adding retry logic and logging errors to monitor and troubleshoot effectively.
How do I set up the plugin's manifest file?
The manifest file is crucial for configuring the plugin. It specifies the API specification and other settings, helping the ChatGPT interface recognize and integrate the plugin properly. Be sure to follow the manifest file requirements closely.
How can I connect it to external APIs?
To enable data integration, configure your tool to interact with APIs. Use libraries like requests to make secure HTTP calls, and set up API keys or other authentication protocols to protect data.
Can it securely manage user-specific data?
Yes, with the right security practices, you can safely manage user-specific data. Follow best practices like using strong authentication, API keys, and encryption where appropriate.
_light%201.png)